Cinnamon Ornaments

I got this recipe from a friend years back. When Christmas comes around I LOVE making these with the kids. They make adorable gift tags, ornaments and make your house smell AMAZING!!! I wanted to be sure to get this recipe up soon so you could make plans to make these adorable Cinnamon ornaments with your little angels this year for the holidays! :) (Btw, these are NOT to be eaten!)
Cinnamon Ornaments
1 C applesauce (non-sweetened)
3/4 C ground cinnamon
1 T ground allspice
1 T ground nutmeg
2 T ground cloves
McDonald size straw
Ribbon for adorning
Mix all the ingredients well and place on to a smooth surface and knead until all incorporated and the mixture acts like play dough. Sprinkle cinnamon if you need to use it like flour when making sugar cookies. Roll out dough into 1/4 inch thick slab and cut out shapes using cookie cutters or shape like play dough.
Use a straw (the McDonald's ones or that size works well) or something to make a hole for ribbon or string. Allow ornaments to dry separately on cardboard for 5-7 days. A dehydrator works well and they are ready overnight. Do not put in the oven, it cracks. Adorn with ribbon and hang. Makes great tags for a gift if you use a Sharpie. You can also use glue and glitter to give it some extra bling (decorate as you would sugar cookies)! I love using the craft glitter glue and top with initials!
For those of you who have access to Winco or other bulk spice purchasing - it's a really economical little something to give at Christmas.
Freezing Blueberries
 My sweet friend Marta stopped by at the end of the summer from picking fresh blueberries from a local farm. She was sweet enough to bring me 2 gallon size containers FULL of these blue beauties! I decided to eat some & use some right away!!! But then I still had a ton that I needed to freeze. So I rinsed all of the blueberries and let them air dry. Then I put wax paper on some baking sheets and spread the berries out in a single layer and put them in the freezer until they were frozen through.
Then I put them all into a ziplock freezer bag and placed them back into the freezer! Ta-DA! The wonderful thing about freezing them on the cookie sheet first is that they don't stick together! So when you are ready to make that YUMMY Blueberry Buckle recipe, you can go into your freezer and only scoop out the amount you need for your recipe! Easy Peasy!!! :)


Baby Food
When my oldest (who is now almost 3) started eating baby food I would shop for the most wholesome jarred food I could come across. I wanted to be sure I knew what was going into that growing little body of his. So he ate a lot of Earth's Best Baby Food. When I had my second son I figured there had to be another way. By then Jarred baby food had gone up in price from .59 cents a jar to around .89 cents a jar! I started my search online of course reading and learning about homemade baby food. I HAVE to give a shout out to www.wholesomebabyfood.com They taught me everything I know about making your own baby food...recipe's and everything! I was a little sceptical thinking this was going to take me a whole lot of time that I DON'T have now that I have 2 boys! I figured I would give it one shot and see if it was even worth the effort. Let me tell you guys...I was SOLD!!! It was THE easiest thing in the WORLD! I made 3 gallon size zip locks full of baby food one day while both of my boys were down for their afternoon nap and I had time to spare! My little turtle is almost 9 months now and I have been making his food since he was 5 months. So, I figured since this blog was ALL about food...I would show you how easy it is to prepare my little guys food!
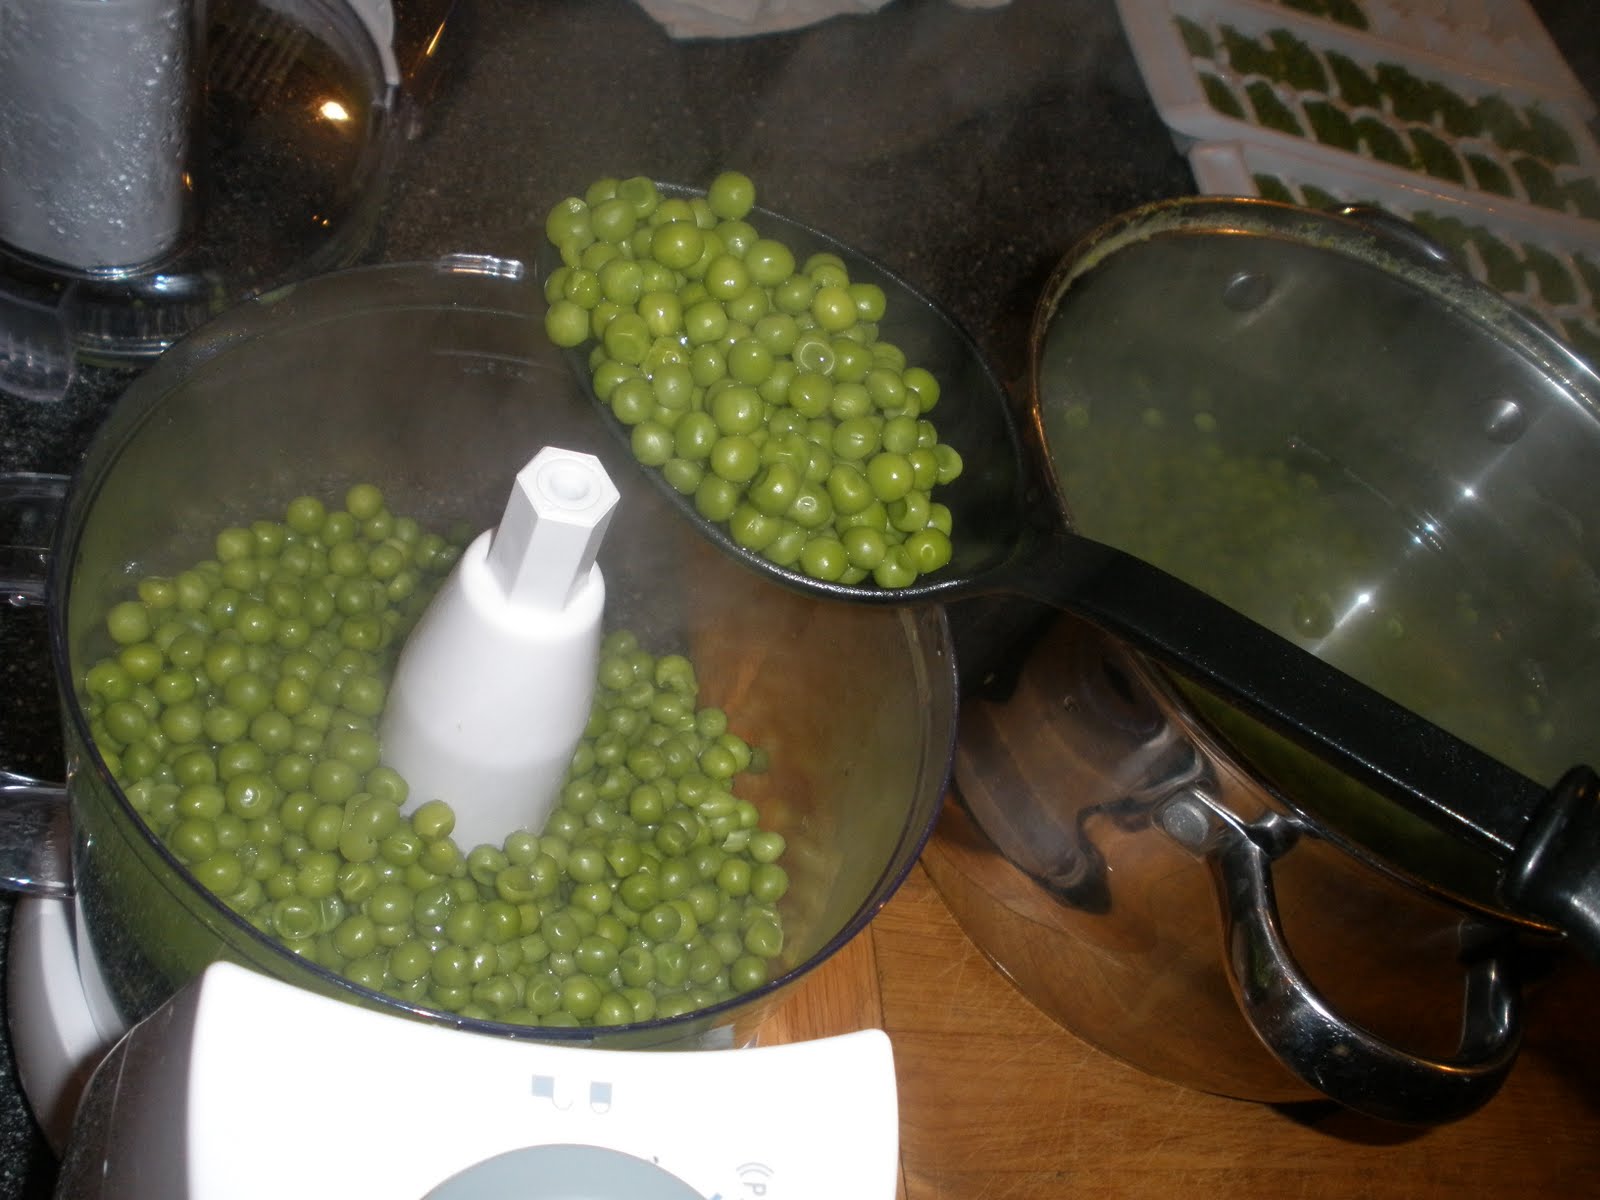
First, I start by boiling one 5lb. bag of Bybee Foods Organic Frozen Peas (from Costco). I allow them to boil for about 10 minutes. Important Fact: Any time you are making baby food it is best to use as fresh as possible. Since I didn't have access to fresh peas, frozen was second best and still full of vitamins and all that good stuff!

Second, I strain the peas and put them into my food processor and add a few spoon fulls of the water (that I boiled the frozen peas in) and then process on high for a full minute.
Third, I spoon the pea pure' into clean and sterile ice cube trays. Important fact: One ice cube is about 1 oz. The stage 1 baby food comes in 4 oz. jars, so my little guy eats 4 cubes a meal! He is about ready to move up to stage 2 which is 6oz jars, so he will eat 6 cube...you get the idea! ;o)

Fourth, I allow the baby food to cool on the counter and then cling wrap them and stick them into the freezer for about 12-14 hours. Then I just pop them out and store them in gallon size freezer zip locks! It works wonders. Just always be sure to label your bag with a sharpie to know how long it has been in the freezer and if it is green beans or peas! Important fact: Baby food lasts up to 3 months in a regular freezer and up to 12 months in a deep freezer.

That's IT! You can use this process when making carrots, green beans, sweet potatoes, etc. With my fruit I skip the cooking process all together and just peel, pure' and then freeze! The savings is pretty remarkable too! I bought a huge bag of pears (again Costco) for $3.79 and it made 16 (4oz) jars of baby food. Now that baby food is up to .89 cents a jar who couldn't afford this savings!? 16 jars of pears for $3.79! AMAZING...and I know how it was made and what is in my son's baby food. I hope you give this a try...it will TOTALLY be worth it! :)
Colored Play Dough

Materials:
• 1 cup water
• 1 tablespoon vegetable oil
• 1/2 cup salt
• 1 tablespoon cream of tartar
• Food coloring
• Saucepan
• 1 cup flour
Combine water, oil, salt, cream of tartar, and food coloring in a saucepan and heat until warm.
• 1 cup water
• 1 tablespoon vegetable oil
• 1/2 cup salt
• 1 tablespoon cream of tartar
• Food coloring
• Saucepan
• 1 cup flour

Combine water, oil, salt, cream of tartar, and food coloring in a saucepan and heat until warm.

(My cute little helpers...they were soooo excited!)
Remove from heat and add to flour.


Stir, then knead until smooth. The cream of tartar makes this dough last 6 months or longer, so resist the temptation to omit this ingredient if you don't have it on hand.


Store this dough in an airtight container or a Ziploc freezer bag.
ENJOY!!! This was super easy & was lots of fun!

ENJOY!!! This was super easy & was lots of fun!